10个常见的使用场景,助你从 Vue2 丝滑过渡到 Vue3 !

相信有很多这样的兄弟,学了 Vue3 的各种 API 和新特性,但公司项目依然使用的是 Vue2 ,也不知道自己的水平能否上手 Vue3 项目。其实你学的是零碎的知识点,缺少真实的使用场景。
今天就把实战过程中遇到的十个场景分享给大家,结合尤大大推荐的 <script setup>,希望你能从 Vue2 丝滑过渡到 Vue3!
场景一:父子组件数据传递
父组件数据传递到子组件
Vue3 中父组件同样是通过属性传递数据,但子组件接受数据的方式和 Vue2 不同。在 <script setup> 中,props 需要使用 defineProps() 这个宏函数来进行声明,它的参数和 Vue2 props 选项的值是一样的。
<!-- 父组件 -->
<script setup>
import ChildView from './ChildView.vue'
</script>

<template>
  <ChildView some-prop="parent message" />
</template>
复制代码
<!-- 子组件 -->
<script setup>
const props = defineProps({
someProp: {
type: String,
required: true
}
})
console.log(props.someProp) // parent message
</script>
<template>
<!-- 使用 someProp 或 props.someProp -->
<div>{{ someProp }}</div>
<div>{{ props.someProp }}</div>
</template>
复制代码注意:defineProps 、defineEmits 、 defineExpose 和 withDefaults 这四个宏函数只能在 <script setup> 中使用。他们不需要导入,会随着 <script setup> 的处理过程中一起被编译。
子组件数据传递到父组件
Vue2 中子组件数据传递到父组件,通常是使用 $emit 触发一个自定义事件来进行传递。但 $emit 无法在 <script setup> 中使用,这时候我们需要使用 defineEmits():
<!-- 子组件 -->
<script setup>
const emit = defineEmits(['someEvent'])
function onClick() {
  emit('someEvent', 'child message')
}
</script>

<template>
  <button @click="onClick">点击</button>
</template>
复制代码
<!-- 父组件 -->
<script setup>
import ChildView from './ChildView.vue'
function someEvent(value) {
console.log(value) // child message
}
</script>
<template>
<ChildView @some-event="someEvent" />
</template>
复制代码父组件使用子组件数据
在 <script setup> 中,组件的属性和方法默认都是私有的。父组件无法访问到子组件中的任何东西,除非子组件通过 defineExpose 显式的暴露出去:
<!-- 子组件 -->
<script setup>
import { ref } from 'vue'

const msg = ref('hello vue3!')
function change() {
  msg.value = 'hi vue3!'
  console.log(msg.value)
}
// 属性或方法必须暴露出去,父组件才能使用
defineExpose({ msg, change })
</script>
复制代码
<!-- 父组件 -->
<script setup>
import ChildView from './ChildView.vue'
import { ref, onMounted } from 'vue'
const child = ref(null)
onMounted(() => {
console.log(child.value.msg) // hello vue3!
child.value.change() // hi vue3!
})
</script>
<template>
<ChildView ref="child"></ChildView>
</template>
复制代码场景二:组件之间双向绑定
大家都知道 Vue2 中组件的双向绑定采用的是 v-model 或 .snyc 修饰符,两种写法多少显得有点重复,于是在 Vue3 中合成了一种。Vue3 统一使用 v-model 进行处理,并且可以和多个数据进行绑定,如 v-model:foo、v-model:bar。
v-model 等价于 :model-value="someValue" 和 @update:model-value="someValue = $event"
v-model:foo 等价于 :foo="someValue" 和 @update:foo="someValue = $event"
下面就是一个父子组件之间双向绑定的例子:
<!-- 父组件 -->
<script setup>
import ChildView from './ChildView.vue'
import { ref } from 'vue'

const msg = ref('hello vue3!')
</script>

<template>
  <ChildView v-model="msg" />
</template>
复制代码
<!-- 子组件 -->
<script setup>
defineProps(['modelValue'])
const emit = defineEmits(['update:modelValue'])
</script>
<template>
<div @click="emit('update:modelValue', 'hi vue3!')">{{ modelValue }}</div>
</template>
复制代码子组件可以结合 input 使用:
<!-- 子组件 -->
<script setup>
defineProps(['modelValue'])
const emit = defineEmits(['update:modelValue'])
</script>

<template>
  <input :value="modelValue" @input="emit('update:modelValue', $event.target.value)" />
</template>
复制代码
如果你觉得上面的模板比较繁琐,也可以结合 computed 一起使用:
<!-- 子组件 -->
<script setup>
import { computed } from 'vue'

const props = defineProps(['modelValue'])
const emit = defineEmits(['update:modelValue'])
const newValue = computed({
  get() {
    return props.modelValue
  },
  set(value) {
    emit('update:modelValue', value)
  }
})
</script>

<template>
  <input v-model="newValue" />
</template>
复制代码
场景三:路由跳转,获取路由参数
在 Vue2 中我们通常是使用 this.$router 或 this.$route 来进行路由的跳转和参数获取,但在 <script-setup>中,是这些方法无法使用的。我们可以使用 vue-router 提供的 useRouter 方法,来进行路由跳转:
<script setup>
import { useRouter } from 'vue-router'

const router = useRouter()
function onClick() {
  router.push({
    path: '/about',
    query: {
      msg: 'hello vue3!'
    }
  })
}
</script>
复制代码
当我们要获取路由参数时,可以使用 vue-router 提供的 useRoute方法:
<script setup>
import { useRoute } from 'vue-router'

const route = useRoute()
console.log(route.query.msg) // hello vue3!
</script>
复制代码
场景四:获取上下文对象
Vue3 的 setup 中无法使用 this 这个上下文对象。可能刚接触 Vue3 的兄弟会有点懵,我想使用 this 上的属性和方法应该怎么办呢。虽然不推荐这样使用,但依然可以通过 getCurrentInstance 方法获取上下文对象:
<script setup>
import { getCurrentInstance } from 'vue'

// 以下两种方法都可以获取到上下文对象
const { ctx } = getCurrentInstance()
const { proxy }  = getCurrentInstance()
</script>
复制代码
这样我们就可以使用 $parent 、$refs 等,干自己想干的事情了,下面是我打印出来的 ctx 的完整属性。
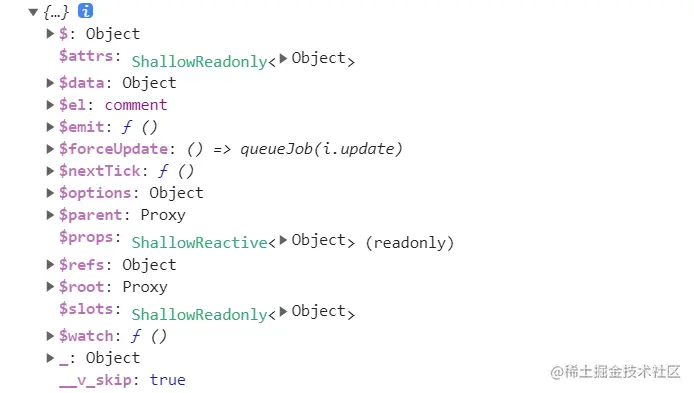
注意:ctx 只能在开发环境使用,生成环境为 undefined 。 推荐使用 proxy ,在开发环境和生产环境都可以使用。
场景五:插槽的使用
在 Vue2 的中一般是通过 slot 属性指定模板的位置,通过 slot-scope 获取作用域插槽的数据,如:
<!-- 父组件 -->
<script setup>
import ChildView from './ChildView.vue'
</script>

<template>
  <div>parent<div>
  <ChildView>
    <template slot="content" slot-scope="{ msg }">
      <div>{{ msg }}</div>
    </template>
  </ChildView>
</template>
复制代码
<!-- 子组件 -->
<template>
<div>child</div>
<slot name="content" msg="hello vue3!"></slot>
</template>
复制代码在 Vue3 中则是通过 v-slot 这个指令来指定模板的位置,同时获取作用域插槽的数据,如:
<!-- 父组件 -->
<script setup>
import ChildView from './ChildView.vue'
</script>

<template>
  <div>parent</div>
  <ChildView>
    <template v-slot:content="{ msg }">
      <div>{{ msg }}</div>
    </template>
  </ChildView>
</template>

<!-- ChildView 也可以简写为: -->
<ChildView>
  <template #content="{ msg }">
    <div>{{ msg }}</div>
  </template>
</ChildView>
复制代码
<!-- 子组件 -->
<template>
<div>child</div>
<slot name="content" msg="hello vue3!"></slot>
</template>
复制代码注意:v-slot 在 Vue2 中也可以使用,但必须是 Vue2.6+ 的版本。
场景六:缓存路由组件
缓存一般的动态组件,Vue3 和 Vue2 的用法是一样的,都是使用 KeepAlive 包裹 Component。但缓存路由组件,Vue3 需要结合插槽一起使用:
// Vue2 中缓存路由组件
<KeepAlive>
  <RouterView />
</KeepAlive>
复制代码
// Vue3 中缓存路由组件
<RouterView v-slot="{ Component }">
<KeepAlive>
<Component :is="Component"></Component>
</KeepAlive>
</RouterView>
复制代码一个持续存在的组件可以通过 onActivated() 和 onDeactivated() 两个生命周期钩子注入相应的逻辑:
<script setup>
import { onActivated, onDeactivated } from 'vue'

onActivated(() => {
  // 调用时机为首次挂载
  // 以及每次从缓存中被重新插入时
})

onDeactivated(() => {
  // 调用时机为从 DOM 上移除、进入缓存
  // 以及组件卸载时
})
</script>
复制代码
场景七:逻辑复用
Vue2 中逻辑复用主要是采用 mixin,但 mixin 会使数据来源不明,同时会引起命名冲突。所以 Vue3 更推荐的是全新的 Composition Api。
下面是鼠标跟踪的例子,我们可以把逻辑提取出来:
// mouse.js
import { ref, onMounted, onUnmounted } from 'vue'

// 按照惯例,组合式函数名以 use 开头
export function useMouse() {
  // 组合式函数管理的数据
  const x = ref(0)
  const y = ref(0)

  function update(event) {
    x.value = event.pageX
    y.value = event.pageY
  }

  // 组合式函数可以挂靠在所属组件的生命周期上,来启动和卸载副作用
  onMounted(() => window.addEventListener('mousemove', update))
  onUnmounted(() => window.removeEventListener('mousemove', update))

  // 通过返回值暴露所管理的数据
  return { x, y }
}
复制代码
这时候在组件中我们就可以直接使用 mouse.js 暴露的数据了。
<script setup>
import { useMouse } from './mouse.js'

const { x, y } = useMouse()
</script>

<template>Mouse position is at: {{ x }}, {{ y }}</template>
复制代码
我们还可以在一个组件中引入多个组合式函数,或者在一个组合式函数中引入其他的组合式函数,这个比较简单,我就不演示了。接下来,我们看看使用异步方法的组合式函数。
在做异步数据请求时,我们通常需要处理三个不同的状态:加载中、加载成功和加载失败。获取这些状态的逻辑是通用的,我们可以把它提取出来:
// request.js
import { ref } from 'vue'

export function useRequest(url) {
  const data = ref(null)
  const error = ref(null)

  axios.get(url)
    .then((res) => (data.value = res.data))
    .catch((err) => (error.value = err))

  return { data, error }
}
复制代码
现在我们在组件中只需要:
<script setup>
import { useRequest } from './request.js'

const { data, error } = useRequest('http://...')
</script>

<template>
  <div v-if="data">Data is: {{ data }}</div>
  <div v-else-if="error">Error message is: {{ error.message }}</div>
  <div v-else>Loading...</div>
</template>
复制代码
任何组件都可以使用上面这个逻辑,这就是逻辑复用。是不是可以节省很多重复的代码,感觉摸鱼时间又要增加了~
场景八:生命周期
Vue3 的生命周期和 Vue2 相比,有以下改动:
-
Vue3生命周期钩子都以on开头,并且需要在组件中手动导入。<script setup> import { onMounted } from 'vue' onMounted(() => { console.log('onMounted') }) </script> 复制代码 -
Vue3 取消了
beforeCreate和created钩子。如果需要在组件创建前注入逻辑,直接在<script setup>中编写同步代码就可以了。如果这几个钩子同时存在,setup的执行顺序要优先于beforeCreate和created。 -
Vue3 中组件卸载的钩子名称有变化,
beforeDestroy改为onBeforeUnmount,destroyed改为onUnmounted。
场景九:全局 API
Vue2 中的全局属性或全局方法,是在构造函数 Vue 的原型对象上进行添加,如:Vue.prototype.$axios = axios 。但在 Vue3 中,需要在 app 实例上添加:
// main.js
app.config.globalProperties.$axios = axios
复制代码
在组件中使用:
<script setup>
import { getCurrentInstance } from 'vue'

const { proxy } = getCurrentInstance()
proxy.$axios.get('http://...')
</script>
复制代码
Vue3 中其他的全局 API,如 directive 、component 等,跟 Vue2 的用法都差不多,只不过一个是在 Vue 上调用,一个是在 app 实例上调用:
// main.js
// 全局自定义指令
app.directive('focus', {
  mounted(el) {
    el.focus()
  }
})

// 全局自定义组件
import CustomComp from './components/CustomComp.vue'

app.component('CustomComp', CustomComp)
复制代码
需要注意的是,Vue3 废弃了 filter 这个方法,因为通过函数或 computed 可以实现一样的功能。
常见十:与 TypeScript 结合使用
与 TypeScript 结合使用,我们只需要在 <script setup> 中添加 lang="ts" 就可以了。下面是一些和 TypeScript 结合使用的例子。
为 props 标注类型
-
运行时声明。当使用
<script setup>时,defineProps()宏函数支持从它的参数中推导类型:<script setup lang="ts"> const props = defineProps({ foo: { type: String, required: true }, bar: Number }) props.foo // string props.bar // number | undefined </script> 复制代码这被称为
运行时声明,因为传递给defineProps()的参数会作为运行时的 props 选项使用。 -
基于类型的声明。我们还可以通过泛型参数来定义 props 的类型,这种方式更加常用:
<script setup lang="ts">
interface Props {
  foo: string
  bar?: number
}

const props = defineProps<Props>()
</script>
复制代码
这被称为
基于类型的声明,编译器会尽可能地尝试根据类型参数推导出等价的运行时选项。这种方式的不足之处在于,失去了定义 props 默认值的能力。为了解决这个问题,我们可以使用withDefaults宏函数:<script setup lang="ts"> interface Props { msg?: string labels?: string[] } const props = withDefaults(defineProps<Props>(), { msg: 'hello vue3!', labels: () => ['one', 'two'] }) </script> 复制代码
为 ref() 标注类型
-
默认推导类型。ref 会根据初始化时的值自动推导其类型:
import { ref } from 'vue' const year = ref(2022) year.value = '2022' // TS Error: 不能将类型 string 分配给类型 number 复制代码 -
通过接口指定类型。有时我们可能想为 ref 内的值指定一个更复杂的类型,可以使用
Ref这个接口:import { ref } from 'vue' import type { Ref } from 'vue' const year: Ref<string | number> = ref('2022') year.value = 2022 // 成功! 复制代码 -
通过泛型指定类型。我们也可以在调用
ref()时传入一个泛型参数,来覆盖默认的推导行为:const year = ref<string | number>('2022') year.value = 2022 // 成功! 复制代码
为 reactive() 标注类型
-
默认推导类型。
reactive()也会隐式地从它的参数中推导类型:import { reactive } from 'vue' const book = reactive({ title: 'Vue 3 指引' }) book.year = 2022 // TS Error: 类型 { title: string; } 上不存在属性 year 复制代码 -
通过接口指定类型。要显式地指定一个
reactive变量的类型,我们可以使用接口:import { reactive } from 'vue' interface Book { title: string year?: number } const book: Book = reactive({ title: 'Vue 3 指引' }) book.year = 2022 // 成功! 复制代码
其他 API 与 TypeScript 结合使用的方法和上面大同小异,这里我就不一一列举了。具体可以参考这篇文章:如何为 Vue3 组件标注 TS 类型,看这个就够了!。
小结
以上就是我在 Vue3 项目中遇到最多的场景,如果你掌握了 Vue3 常用的 API 和今天这些场景,相信参与 Vue3 项目的开发是没有问题了。当然如果要用好 Vue3 ,可能还需要对 Pinia 、 Vite 等相关生态有一个深入的了解。后面我也会持续分享 Vue3 的使用技巧及相关生态,希望你尽早掌握 Vue3!
有问题欢迎在评论区留言,如果觉得今天的分享对你有所帮助,记得点赞支持一下!😊
给大家推荐一个实用面试题库
1、前端面试题库 (面试必备) 推荐:★★★★★
地址:前端面试题库